Getting started

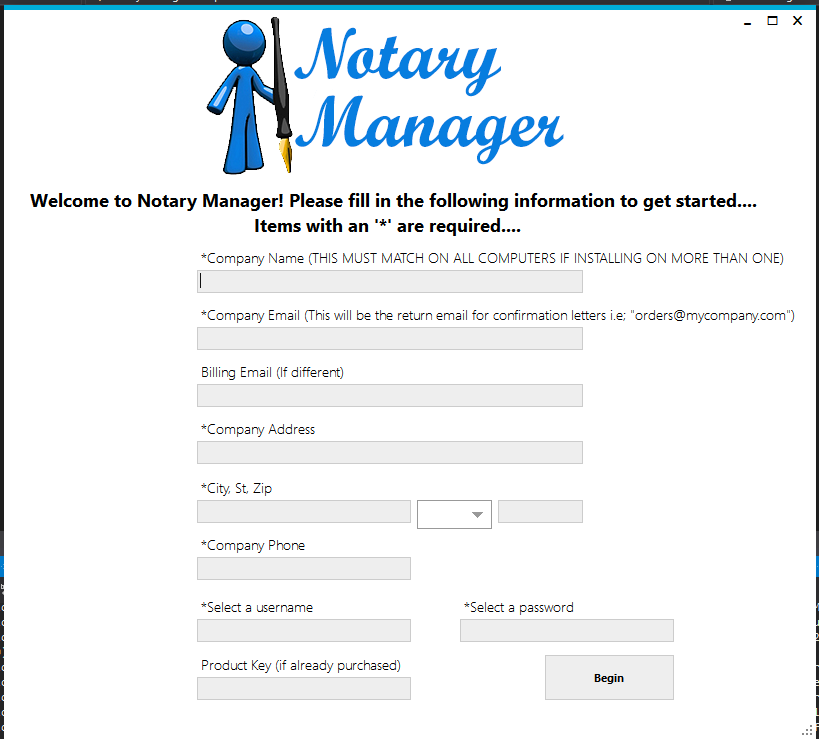
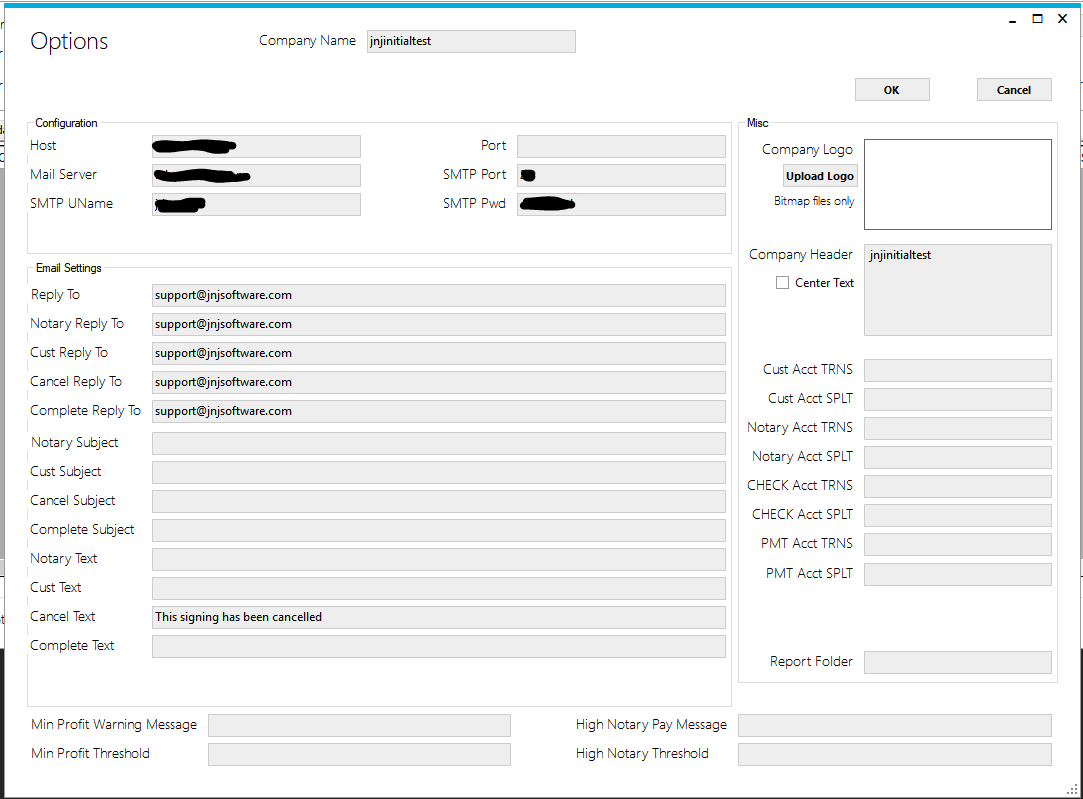
On the first run of Notary Manager you will need to enter your company's information (This only needs to be done once on each computer). If installing on more than one system the company name MUST match on all computers. (You can always verify spelling on the original computer Notary Manager was installed on by going to "Maint" then "Options" in Notary Manager. You will see your company name at the top). Some important points to take note of:

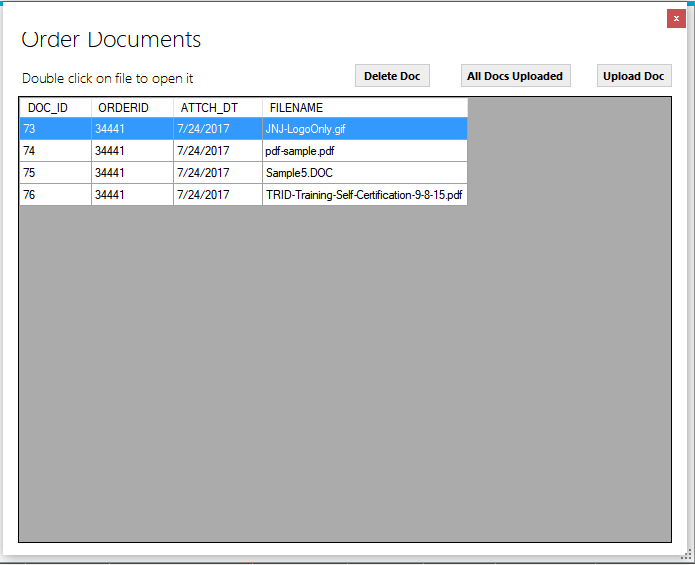
Notary Manager is a 2 part system that consists of both the software you are downloading as well as your own personal website portal for your clients and notarys to login, view and update orders, as well as upload/download documents securely.

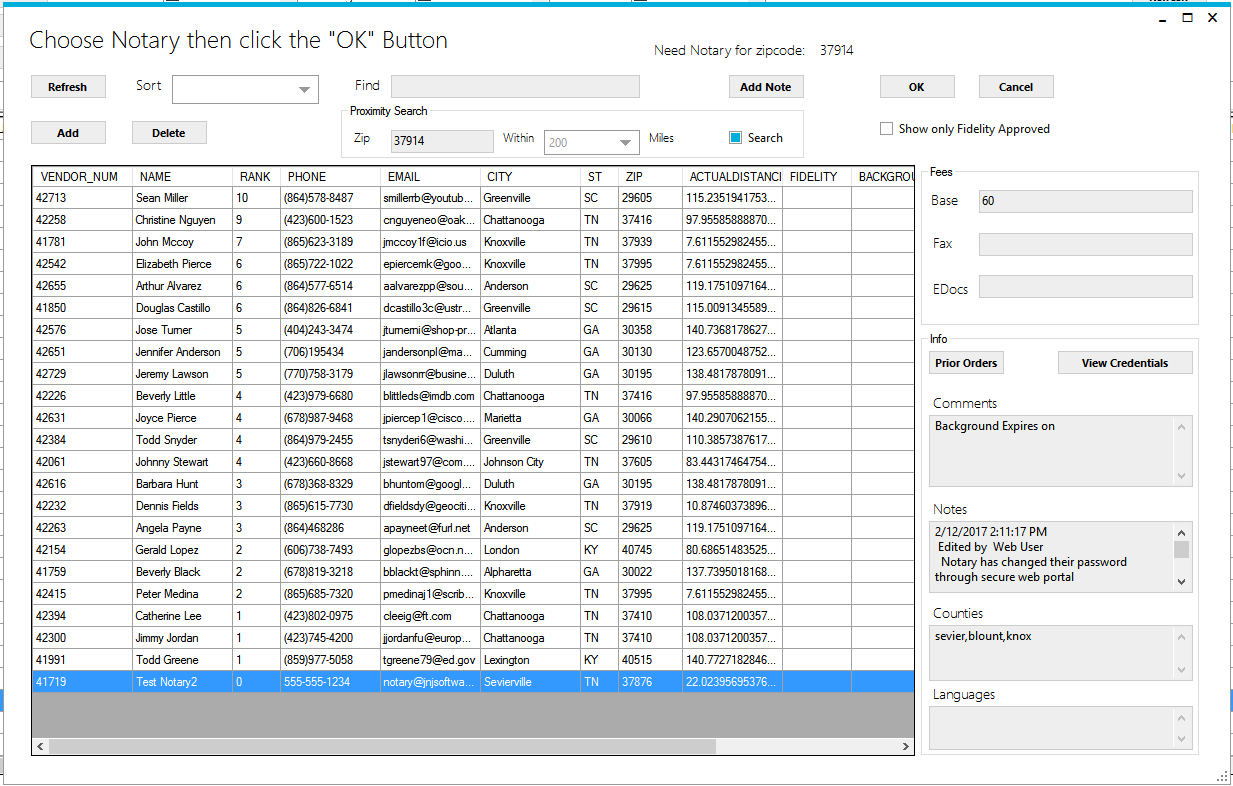
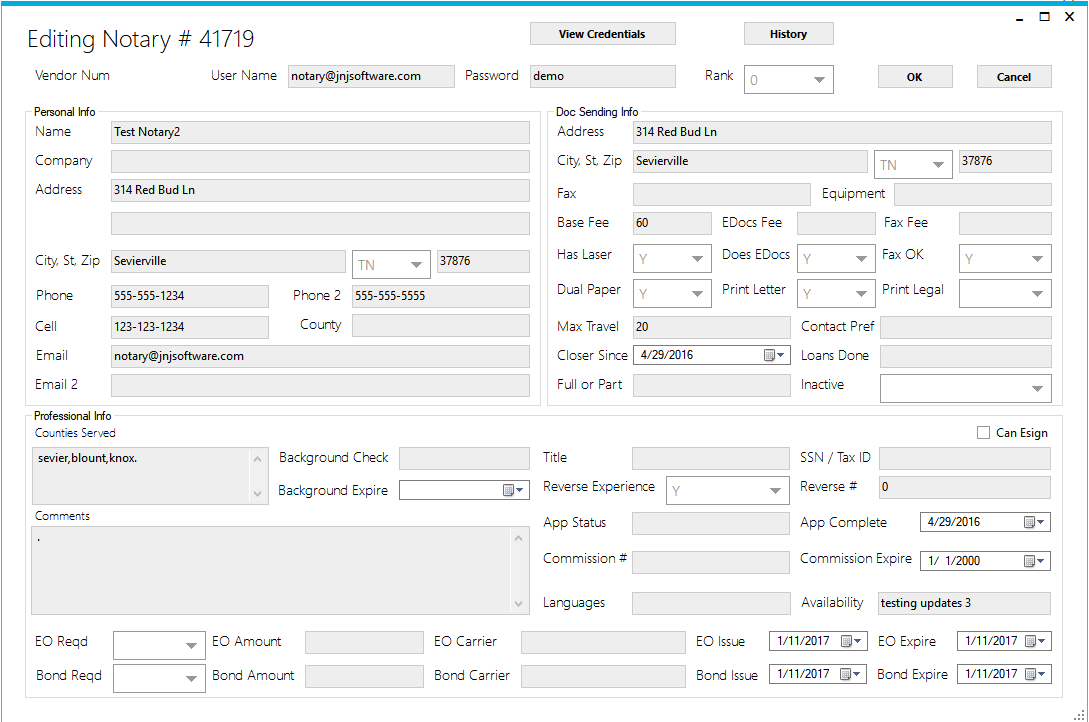
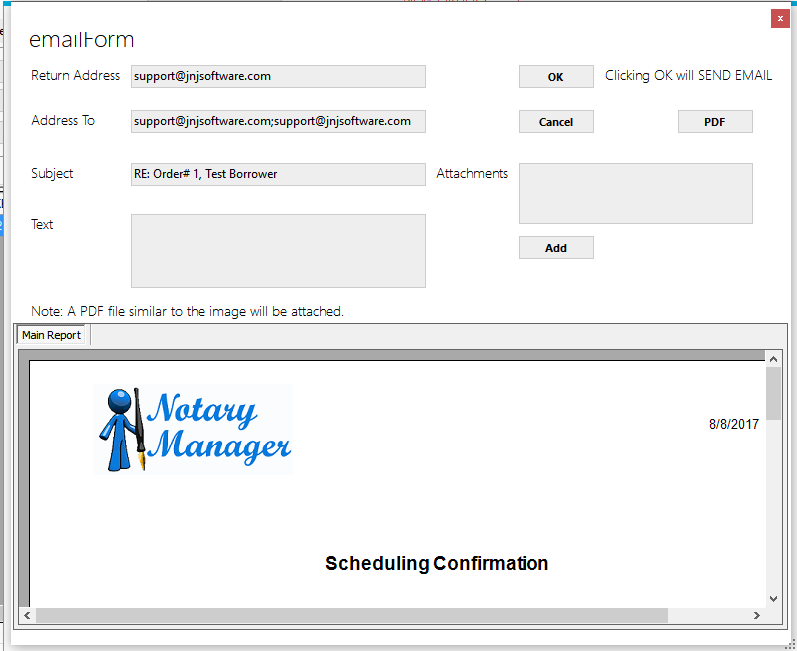
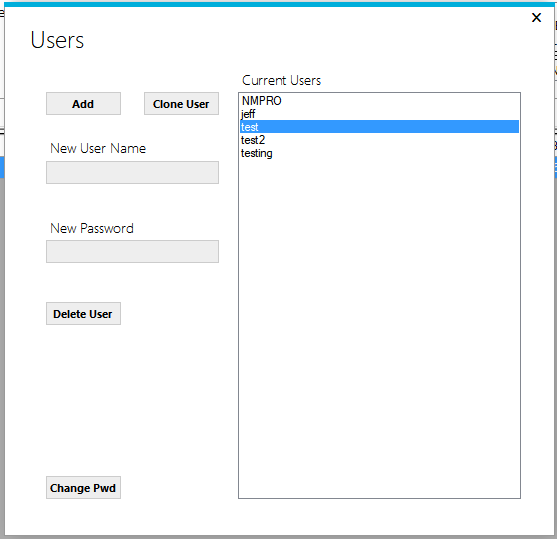
Make sure you use a valid email address, your new website link will be emailed to you within an hour of first installing the software (you can then login as one of your clients or one of your notarys using their username/password. You can locate this in Notary Manager under "Maint" then "Customer" or "Notary".)

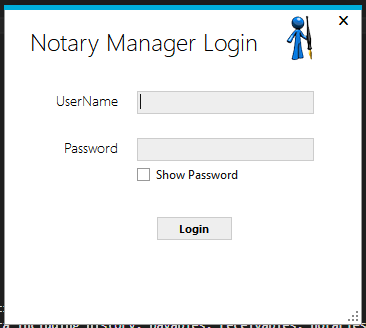
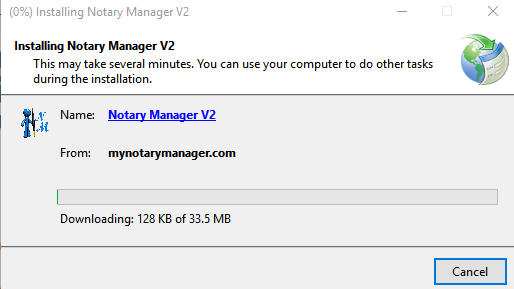
It will take a few minutes to build your database the first time you install and run Notary Manager. Time depends on your connection but usually takes 2-4 minutes. Once you database is built you will get the login screen. You can now login using the username and password you created in the first screen. Should you have ANY issues installing Notary Manager please email us Using this link and we will be happy to assist via Go To Meeting.

feature img
feature img

Installing Notary Manager

Notary Manager™ is a trademarked, copyright protected software digitally signed by JNJ Software, LLC with Veri-Sign code signing certificate, however some third party anti-virus programs may prevent Notary Manager from checking for updates properly or allowing Crystal Reports to install (This is needed for your confirmation letters). It is suggested that you disable/ pause any anti_virus software (Except Windows Defender) when installing the software. After installing you can add Notary Manager to your Anti-Virus safe list. Should you have ANY issues installing Notary Manager please email us Using this link and we will be happy to assist via Go To Meeting.

Once downloaded, navigate to where you saved the install file and double click to open it. (In some browsers you may choose to "Run" directly from the download link). Follow the on screen prompts to install Notary Manager and SAP Crystal Reports.

feature img

1. Depending on your version of Windows, you will likely get a security popup, click on “More Info” on the left side then….

feature img

2. Click on “Run anyway”

feature img

3. You will see 2 of these EULA’s, one for Notary Manager and one for Crystal Reports, click Accept, then a text file will open (So you can save the EULA if desired), close the text file to continue.

feature img

4. If you get this security warning, click install.

feature img

5. At last! You should now see the app installing. You should see SAP Crystal Reports, then Notary Manager install, IF you DO NOT see SAP Crystal Reports install then you have an anit-virus program that is blocking it. You will need to cancel, uninstall (through control panel) and reinstall after you have paused your anit-virus.

feature img

6. If you got this security warning earlier, you will likely see it again, go ahead and click install

feature img

7. Notary Manager will now install, create a desktop shortcut and open

feature img

Main Screen

The main screen shows todays orders by default. There are 4 tabs to allow you to quickly switch views. The "custom" tab has a "date to" and "date from" so you can choose a range of dates to view orders.

A count of new orders are shown at the top in red. This updates automatically

The data is set to automatically refresh anytime a change is made to an order, customer, or notary and also every 3 minutes. The data is refreshed in the background and a green status bar in the top will show whenever the data is being refreshed. The ONLY time you should need to click the refresh button is when using the search boxes or changing dates in the custom tab. Clicking refresh multiple times when not needed will only slow down the refresh.

When sorting using the "customer", "assigned to" or "status" checkboxes, the grid will refresh automatically as you make your choices.

To send emailed confirmation letters, highlight the order then click on the appropriate button below the grid. (See more in the "How To's" Menu)

Double clicking on an order will open up the "order edit" screen. (See more in the "How To's" Menu)

You can reorder and resize the fields as you like, to save go to the menu at the top and click "view" then "save dataview". The 4 grids are independent of one another so you can save different views in each tab the same way.

feature img
feature img
feature img
feature img

Assigning A Notary

After clicking the "Assign Notary" button in the order edit screen a new window opens with notaries within the area of the signing (within 20 miles initially).

Here is where you can choose a Notary by highlighting the Notary then clicking the "OK" button. As you scroll/highlight each notary the information boxes on the right will show you info for that particular Notary. The following features are available in this screen:

  • Select the miles to search by in the dropdown box and then click on the "search".
  • You can also search by notary name in the "find" box then clicking "Refresh". This will search by all notaries regardless of distance.
  • The "Prior Orders" button will open a window with the highlighted Notary's prior order history with your company (If any).
  • The "View Credentials" button will open the Notary Credentials window so you can quickly view credentials on file for that Notary.
  • Double clicking on any Notary will open the "edit Notary" screen for that Notary

Sending Confirmations

Highlight the order you want to send the email and confirmation to, then select the appropriate button. (N = Notary Confirm, C = Customer Confirm, Cx = Cancelled, Co = Completion / Invoice)

The email screen will open and will auto populate most info needed (email addresses, etc.). The following features are available in this screen:

  • Return Address is prefilled from your company email (You can set / change this in the main screen top menu under "maint", "options").
  • Address to is prefilled from the notary or customer's email address depending on the letter being sent (You can manually add or remove email addresses here, each address seperated by a semi colon).
  • Clicking on the "PDF" button allows you to save a copy of the letter if needed.
  • You can add additional attachments if needed to the email.
  • The logo and the header text of the confirmation emails can both be set in the main screen top menu under "maint", "options"
feature img
feature img

Setting up your Letters

You can (and should) add your company's logo and name/address to your confirmation letters.

To do this go to "maint" then "options" in the top menu of the main screen.

  • Click on the "Upload Logo" button and upload your logo file (Must be in bitmap format .bmp).
  • Fill in / change the "company Header" text with your company's information.
  • The header text will be aligned to the left by default. If you would like to center it, check the "Center Text" checkbox.
  • When done just click on the "OK" button and your changes will be saved.

Uploading/Viewing Documents

Order docs can be accessed in multiple places throughout Notary Manager, On the main screen, highlight the order then in the top menu click on "Orders" then "Documents"

When editing or adding an order there is also a "Documents" button on each one of these screens.

  • Upload Doc button allows you to choose and upload a document to the secure server, these docs will be accessable as well in the web portal for your clients and notaries.
  • Deleting a document will delete it from Notary Manager as well as the web portal.
  • The "All Docs Uploaded" button sends an email directly to the Notary (if assigned) informing them that docs for this order are uploaded and gives instructions to the Notary to login to the web portal to retrieve the documents.
  • Double click on a document to open it.
feature img
feature img

Adding / Removing Users

From the main screens top menu, go to "Maint", then "Users".

  • To add a new user, first enter their username and password, then click on the "Add" button.
  • To delete a user, highlight the user, then click on the "Delete User" button.
  • To change a users password, first select user then type in the new password and click the "Change Pwd" button.

Finance / Received Checks

Finance screens can be accessed in the main screen of Notary Manager, On the main screen, in the top menu click on "Finance" then choose the window you would like to open (i.e. Receivables, Payables, Sent Checks, Received Checks, Print Checks).

  • Received checks screen shows paid amounts from your clients.
  • You enter the amount, check received date, and check numbers manually.
  • The system will automatically save this info.
feature img
feature img

Finance / Sent Checks

On the main screen, in the top menu click on "Finance" then choose "Sent Checks".

  • Sent checks screen shows amounts you paid to your Notaries / Vendors.
  • You enter the sent check date, and check numbers manually.
  • The system will automatically save this info.

Finance / Print Checks

On the main screen, in the top menu click on "Finance" then choose "Print Checks".

If you have a check printer you can print checks directly from Notary Manager if needed.

  • You must first enter your first check number (this would be the next check number in line to print).
  • Enter the check date you would like to have printed on the checks.
  • You can test your printing by leaving the "final print run" box UNCHECKED. This will print the checks but NOT save the info in the system.
  • Checking the "final print run" box will print checks and save all info (dates, check numbers, etc) in the system.
feature img
feature img

Finance / Receivables

On the main screen, in the top menu click on "Finance" then choose Receivables.

  • Displays by month and year chosen in top left drop down menus.
  • There are 2 grids, summary on top and details on bottom.
  • When you highlight a client in the summary grid the detail grid will display the breakdown of each order for that client for the given month.
  • selecting "show unpaid only" then "refresh" button will show only those orders that remain unpaid.

Finance / Payables

On the main screen, in the top menu click on "Finance" then choose Payables.

  • Displays by month and year chosen in top left drop down menus.
  • There are 2 grids, summary on top and details on bottom.
  • When you highlight a notary in the summary grid the detail grid will display the breakdown of each order for that notary for the given month.
  • selecting "show paid only" then "refresh" button will show only those orders that have been paid.
feature img